1. PUT THE STUFF ON THE PAGE
(a haphazard intro to html)
Oh hello there again. I don't think we've met. Welcome to the first day of the rest of you life coding. :D Isn't it exciting?????? Seeing how this is the second page in the tutz (we index from zero baby ;)) I'll assume you've already read the first part already and have a brand spankin' new neocities page ready to fill with content! If not, no harm no foul, just click on this LINK, follow the instructions and come back to this page once you're ready to dive in! Otherwise, congrats on building your first website!!!!
Disclaimer: There are many many html and css tutorials out there so feel free to try them all out if this one doesn't work for you! Also, a lot of this section will be almost straight ripped from https://www.w3schools.com/html/html_basic.asp so feel free to just look at it instead
Now the real fun begins. Putting content onto the page!
If you decided to host with neocities, then you should be able to open up a file called index.html and it should look something like this:
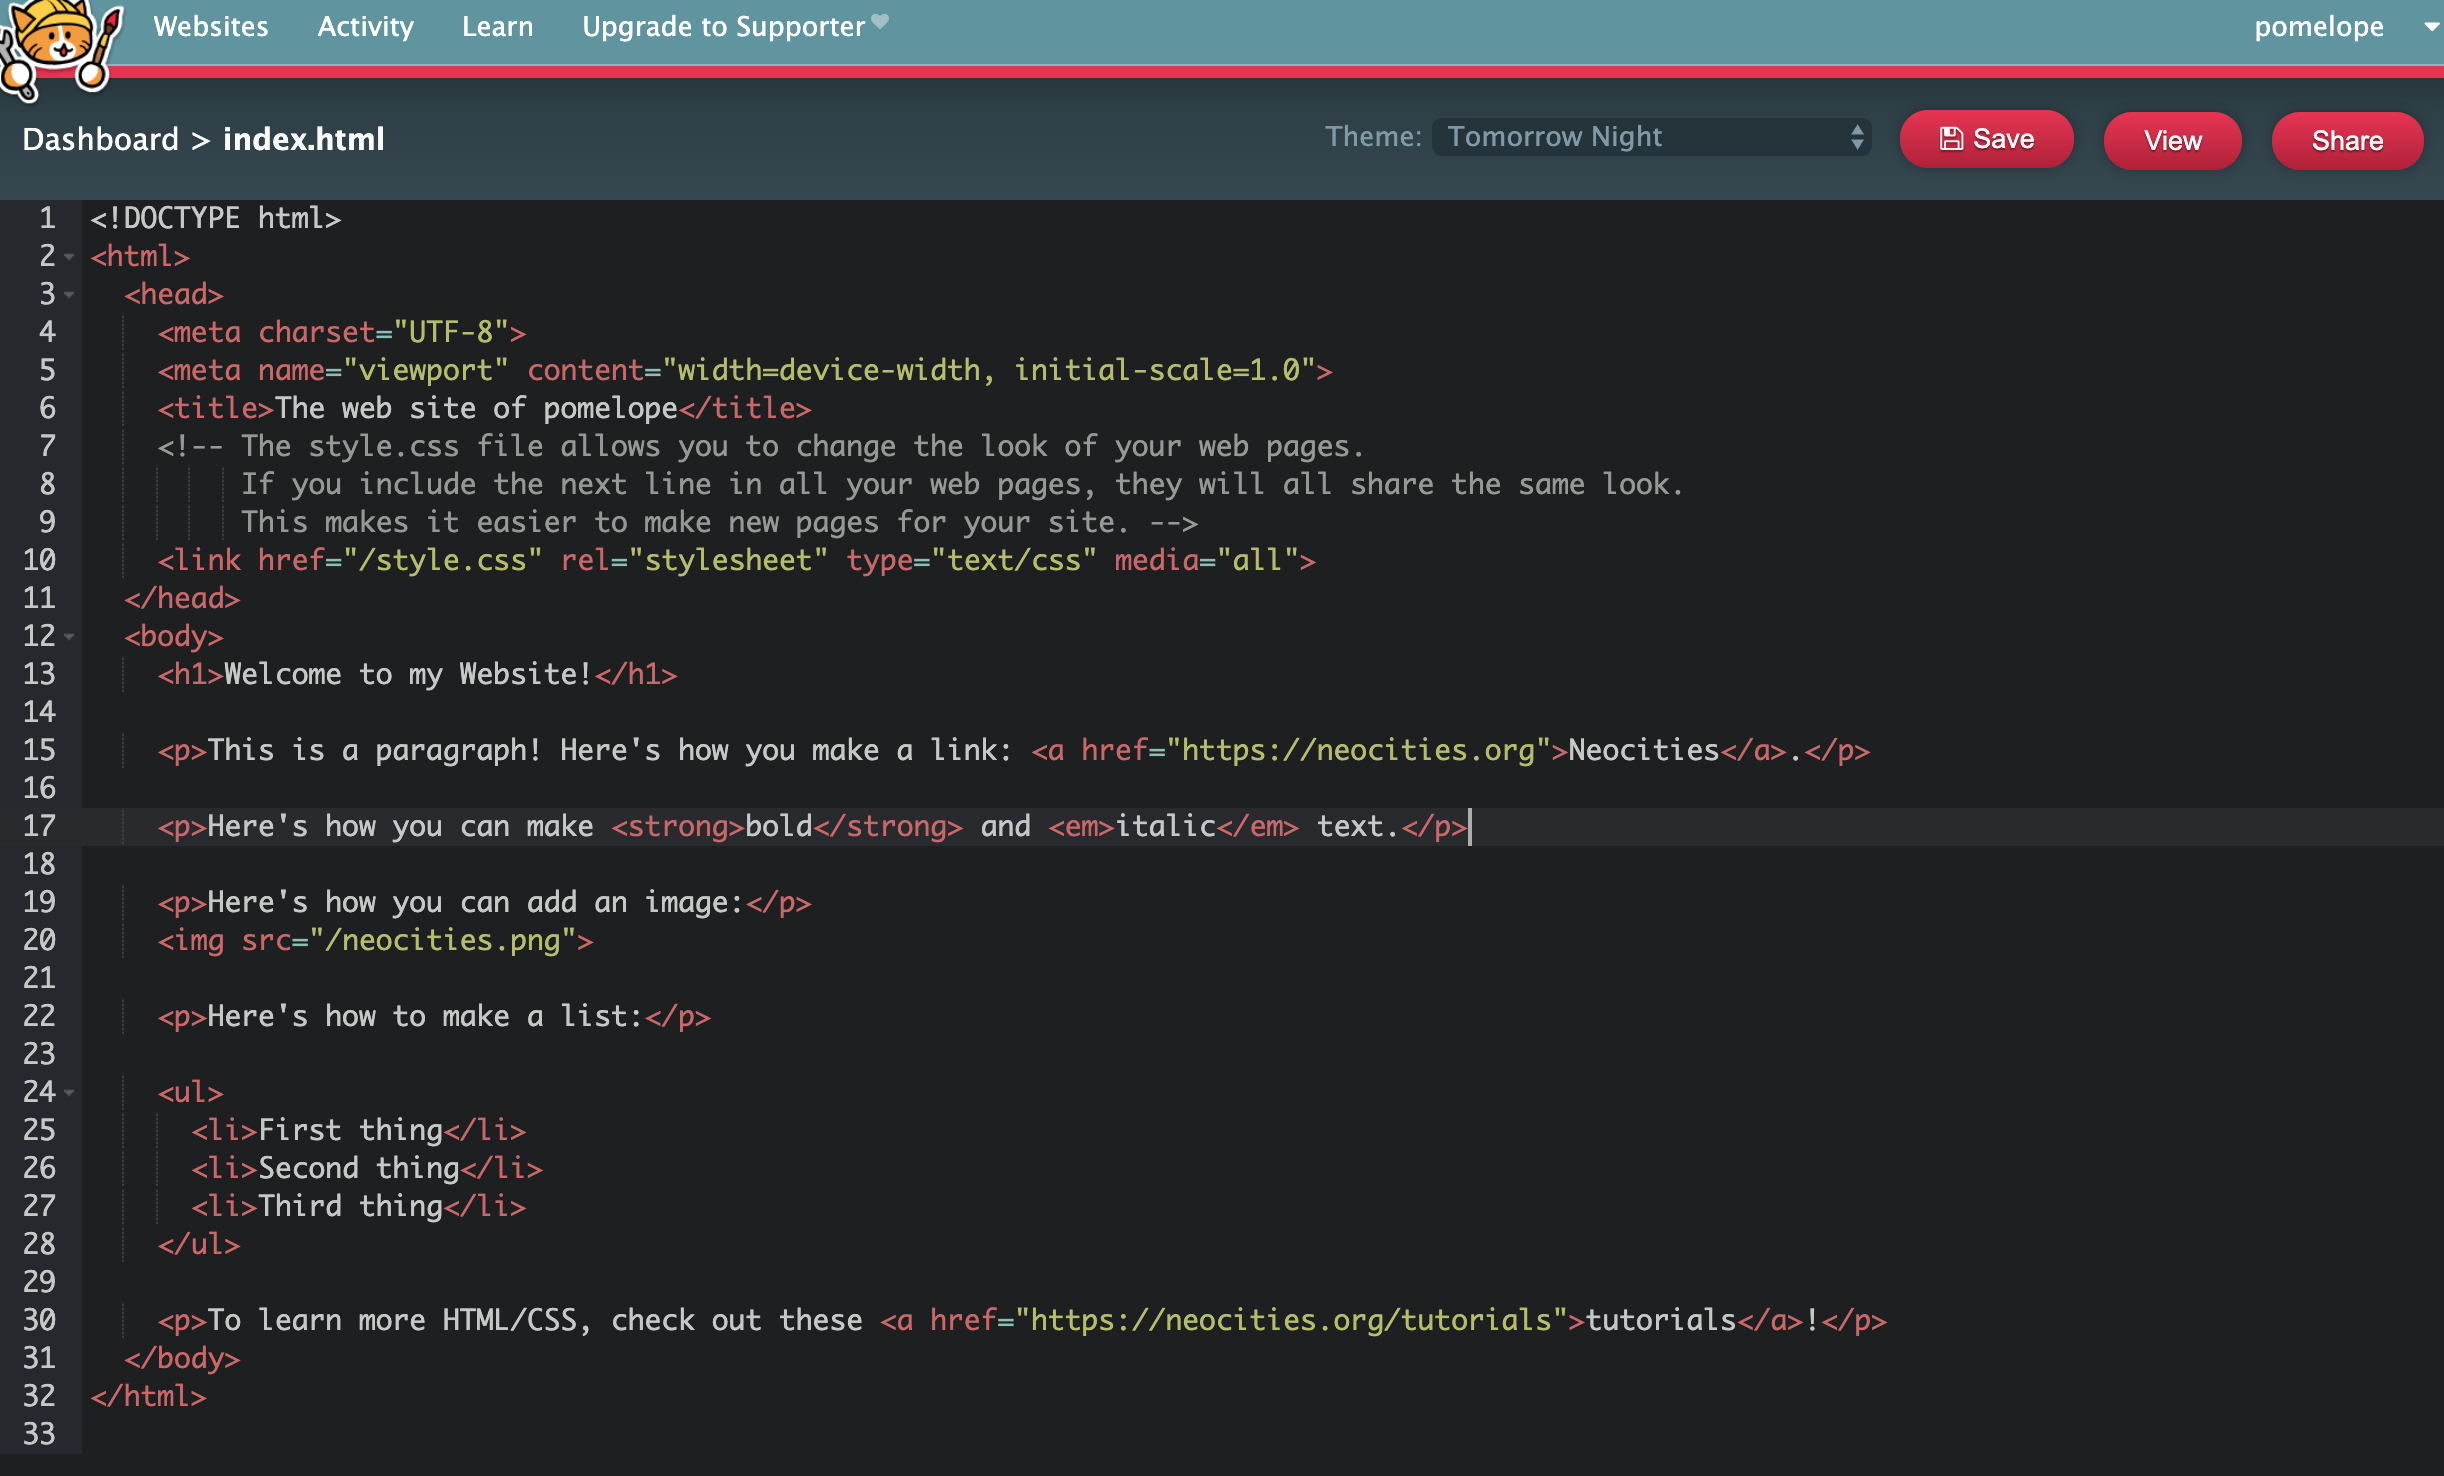
Notice that there are a lot of red text in the image that was linked. These are HTML tags! They are the fundamental building blocks for all web pages! Lots of exclamation points because I'm excited!
The following is an example of what each HTML tag contains and what the terminology are for each part
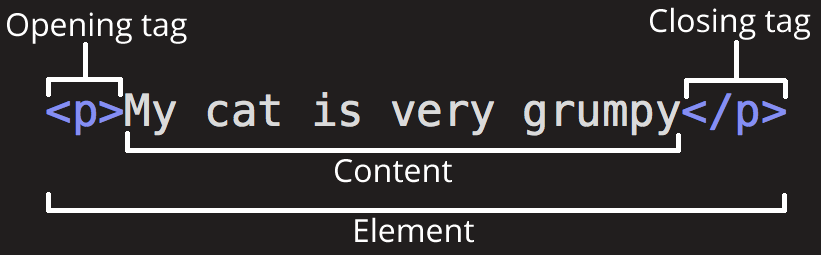
An opening tag indicates to the computer that HEY LOOK AT THIS ELEMENT THIS IS A _ ELEMENT MAKE EVERYTHING FOLLOW THE RULES OF __ until it reaches a closing tag.
The content is what's contained between two html tags and an element is what describes the entire entity!
Going over some of the html used in index.html ^^^
okay i'm not going to regurgitate the text cuz that'll probably be really boring, but for a quick reference in the file we see:
- there's a bunch of things in the
<head>element right now that we can just ignore. h1-> header1 -> MEANS BIG TEXT (fun fact, h2 is also BIG text but not as big)p-> paragraph -> paragraphs with a line breaka href-> link ref -> how to make text link to something elsestrong-> bolds textem-> emphasis -> italicisesimg src-> HOW TO MAKE IMAGES SHOW UP ON THE PAGE. (is a self closing tag which means it does not need</img>)ul-> unordered list -> starts a list with bullet points (if you want an ordered list, useol)li-> list item -> an item in the list
RULE OF THUMB FOR ALL HTML DOCUMENTS!!!!
All HTML documents must start with a document type declaration:
<!DOCTYPE html>just put it in the beginning and don't forget to add
</html>at the end which closes out the html document page. Any text after this tag won't show up on your webpage or even be interpreted as HTML.
VISIBLE PARTS OF THE WEBSITE BELONG BETWEEN
<body> </body>
there are many different element tags that all do slightly different things, read more about different ones here: https://www.w3schools.com/tags/
Another way of thinking of these html tags is that they format the text/images/etc the way you might format text or images by pressing buttons in a document editor!
PRACTICE 1
The following is a screenshot I took of a page I made without changing any of the html tags and only modifying the non-white text.
try changing some stuff in the file on your own to see how what the webpage looks like when you do!
I've included a code pen below that you can open and play around with if you don't want to modify your neocities page yet. Just click edit in codepen vvvvvv
See the Pen QWwrZwa by Lisa (@pomelope) on CodePen.
LE PART 2: more info dump on div and attributes
DA DIV ELEM
this is probably one of the most used elements; it basically allows you to
section of your page in rectangles.
without style it's hard to tell it's doing anything, but let's add the following and see what it does!
add the following line AFTER the <h1> element
<div style="background-color:lightblue"> i love light blue rectangles </div>
which will look like something like this:
notice that only the content between the <div> and </div> is blue
(this is also a sneak peak at what css can do as we can code styles in css which is much easier to do than in the element itself)
if we now move the </div> to after the image, then everything between the two will be blue. try nesting two divs with different colors and see what happens!
ATTRIBUTES
attributes provide additional information about the html element. They go after
the element name itself but before the >. in the div example, we used a
style attribute to indicate that we wanted the div box to be
lightblue. href and src are also attributes that
links, a and images, img use.
some attributes to try in different elements:
<img src="..." height="500" width=80%>
<p title="hover over this element and see what this does"></p>
<p style="text-align:center;font-family:sans-serif"></p>
MORE ATTRIBUTES!!!!!!
| Attribute | Description |
|---|---|
| alt | Specifies an alternative text for an image, when the image cannot be displayed |
| disabled | Specifies that an input element should be disabled |
| href | Specifies the URL (web address) for a link |
| id | Specifies a unique id for an element |
| src | Specifies the URL (web address) for an image |
| style | Specifies an inline CSS style for an element |
| title | Specifies extra information about an element (displayed as a tool tip) |
Practice 2
The following was made completely in html as a simple example to get you started :) Try manipulating the attributes and using different HTML tags than what's already available and see what they do!
See the Pen XWJqxBr by Lisa (@pomelope) on CodePen.
aaaaaand that's the basic jist of writing HTML! put content in tags and make sure the content is surrounded by the element tags that you want it to be! A lot of errors in HTML come from not using the proper tags or forgetting to close a tag. if something isn't showing up, double check the element in question!
Seeing how you've completely mastered HTML and everything about it no questions asked, let's move on to CSS in the next tutorial!